Wireguard: The Road warrior
Tunnels are laid, sites are connected. Now, it's your time to roam! Become the road warrior with Wireguard.
Make it last!

Building on top of what we have setup in the last article: Site to Site VPN guide with Wireguard we should probably make our routing setup persist in between restarts. We don't want our work to vanish after a reboot and render our infrastructure unavailable, are we?
Now with our objective defined, how do we tackle this? First off, as mentioned in the previous article I run Debian stable which means that the networking stack isn't managed via systemd-networkd, but rather via /etc/network/. Therefore this configuration will be assuming you run the same.
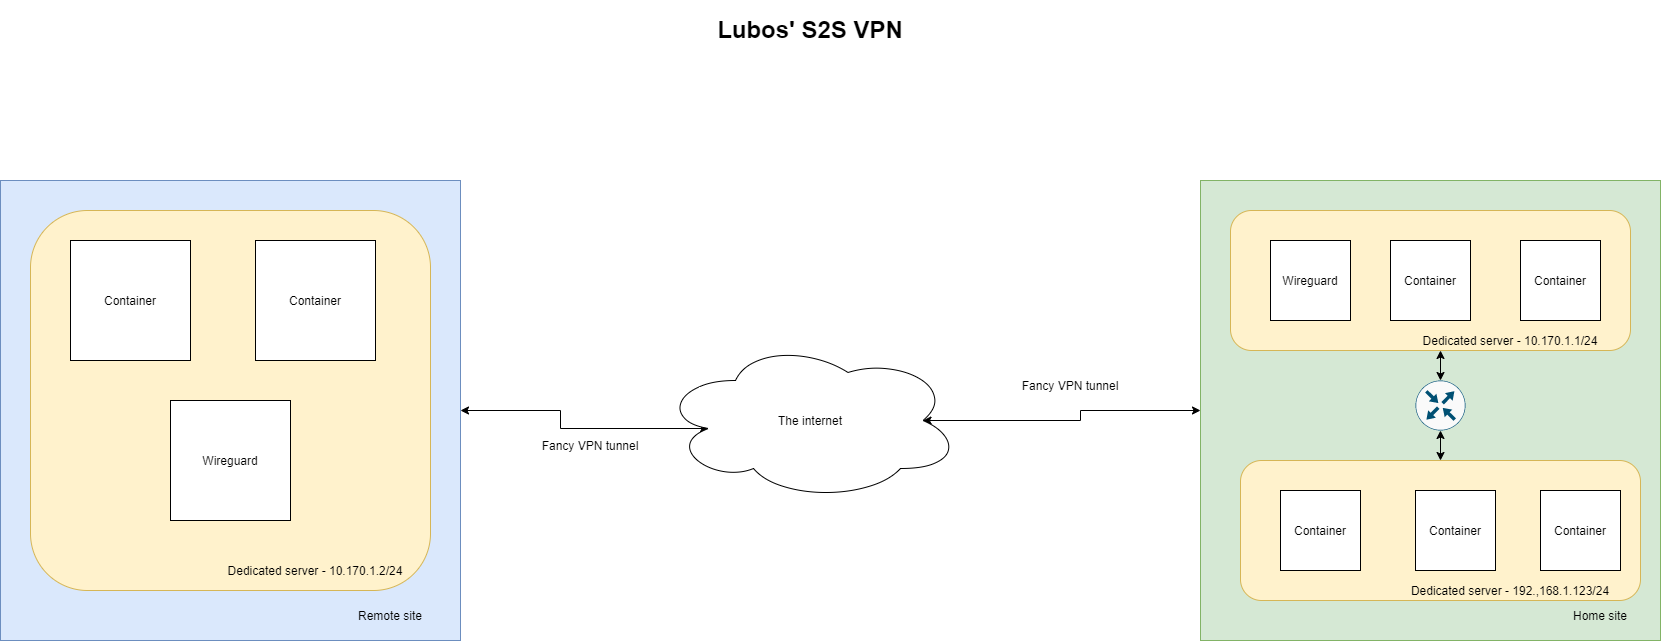
To refresh your memory in my setup, I have only 2 peers:
Most of the configuration will be added to the interfaces configuration file that can be found at /etc/network/interfaces
One small change will be added to your sysctl configuration file, generally found at /etc/sysctl.conf
This is where I keep main part of the network configuration as this peer is our entry gateway to my LAN, therefore it acts as a router for any incoming traffic to LAN from my VPN network device.
This router functionality is achieved by running a NAT, that enables 2 networks( 10.170.1.0/24 & 192.168.0.0/16) to interact between each other.
The specific configuration how to achieve this functionality is following:
# VPN Tunnel
auto wg0
iface wg0 inet static
   address 10.170.1.1/24
   netmask 255.255.255.0
   pre-up ip link add dev wg0 type wireguard
   pre-up wg setconf wg0 /data/containers/conf/vpn.m8.sk/wg0.conf
   pre-up iptables -A FORWARD -o wg0 -j ACCEPT
   pre-up iptables -t nat -A POSTROUTING -o enp1s0 -j MASQUERADE
   post-down ip link delete dev wg0
   post-down iptables -D FORWARD -o wg0 -j ACCEPT
post-down iptables -t nat -D POSTROUTING -o enp1s0 -j MASQUERADEAs you can see there is nothing fancy going on, Wireguard accepts simple configuration, therefore we don't do any real magic in here. Let's go through what is being set:
enp1s0 and that's it!Last bit is to make sure that our Linux kernel knows how to forward ip packets. This can be achieved by adding following line into your /etc/sysctl.conf
net.ipv4.ip_forward = 1With all this said, that's it. We don't need to do any further configuration on Peer 1. We can now verify that the setup works by rebooting our Peer 1
Peers that will be connecting to your LAN via VPN, don't need any fancy NATs. The only thing that we need to add to the standard network interface configuration is a static route to our LAN.
We apply somewhat similar configuration, again to the same file located at /etc/network/interfaces
# VPN Tunnel
auto wg0
iface wg0 inet static
   address 10.170.1.2/24
   netmask 255.255.255.0
   pre-up ip link add dev wg0 type wireguard
   pre-up wg setconf wg0 /data/containers/conf/vpn-2.m8.sk/wg0.conf
   up ip route add 192.168.0.0/16 dev wg0
post-down ip link del dev wg0This configuration is not that different than the first one, so let's go through the differences:
192.168.0.0/16 via wg0 VPN interface.Setup wise we are done, let's test and see, if our configuration works!
We can see that the configuration works, and once the interface is brought up it gets setup properly and it automatically connects to Peer 1. In case you would have more peers, you just repeat the above configuration as many times as you have peers. Assuming your peers are setup properly for Wireguard in the first place.
Now that our remote site can access our LAN in our home site and the configuration is persisted, we should maybe look into the way, how we can enable our LAN clients to access VPN network without the need to install VPN!
Say no more! This part is specific for EdgeRouters, if you have other router taking care of your LAN, you will have to find the appropriate settings yourself.
Login to EdgeRouter WebUI, navigate to Routing section in the upper right menu bar. Once there, click the Add Static Route button.
Following window will pop up, here you will have to fill it based on your network configuration. In my case, my VPN network subnet is 10.170.1.0/24 and my VPN instance in home site that handles the VPN connections has an address 192.168.1.170/32
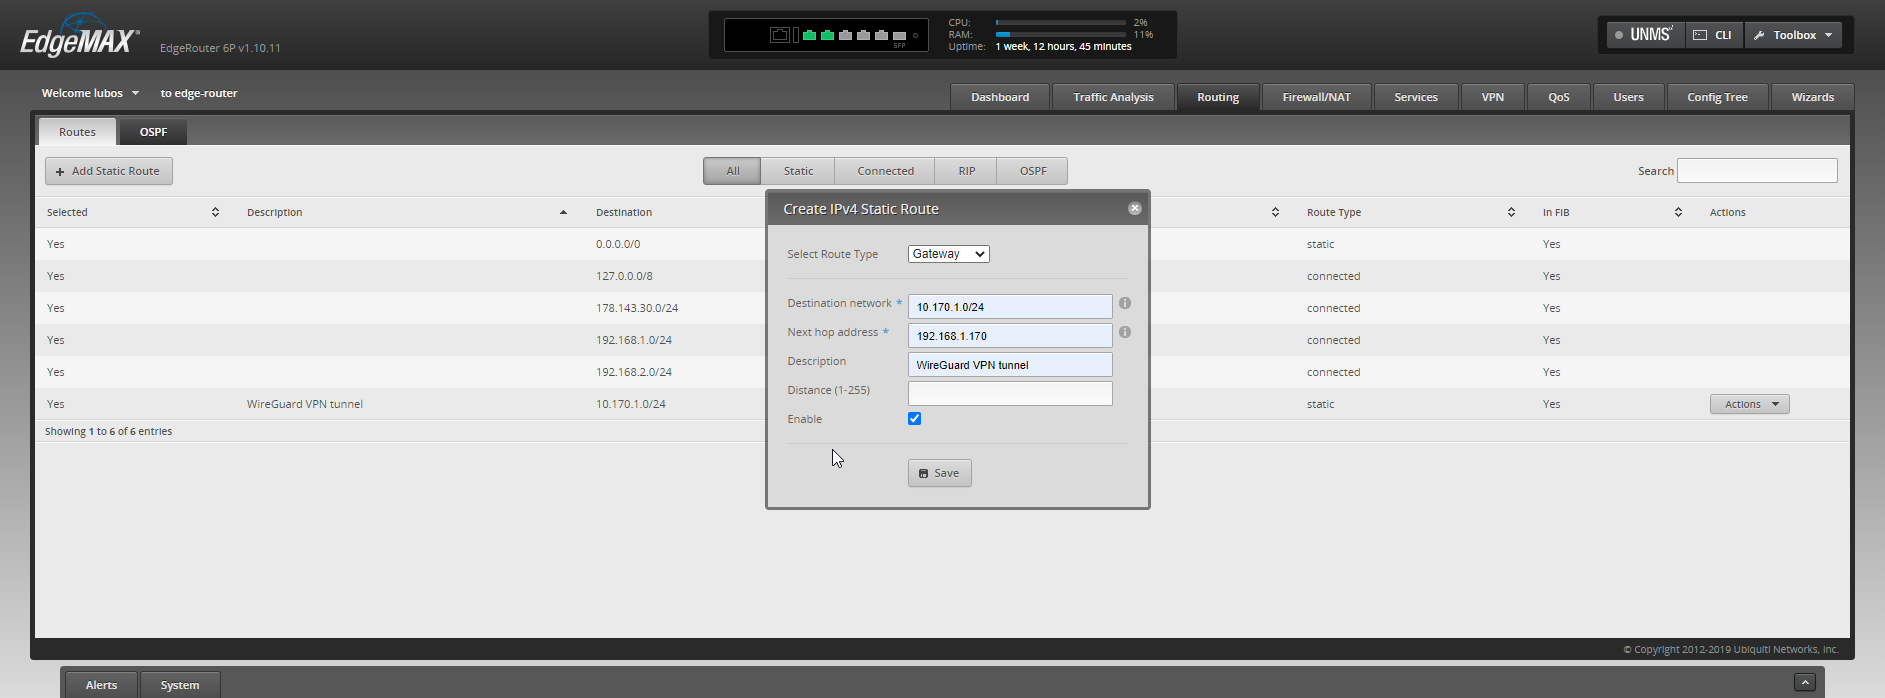
Once set, your configuration should look like something around these lines:
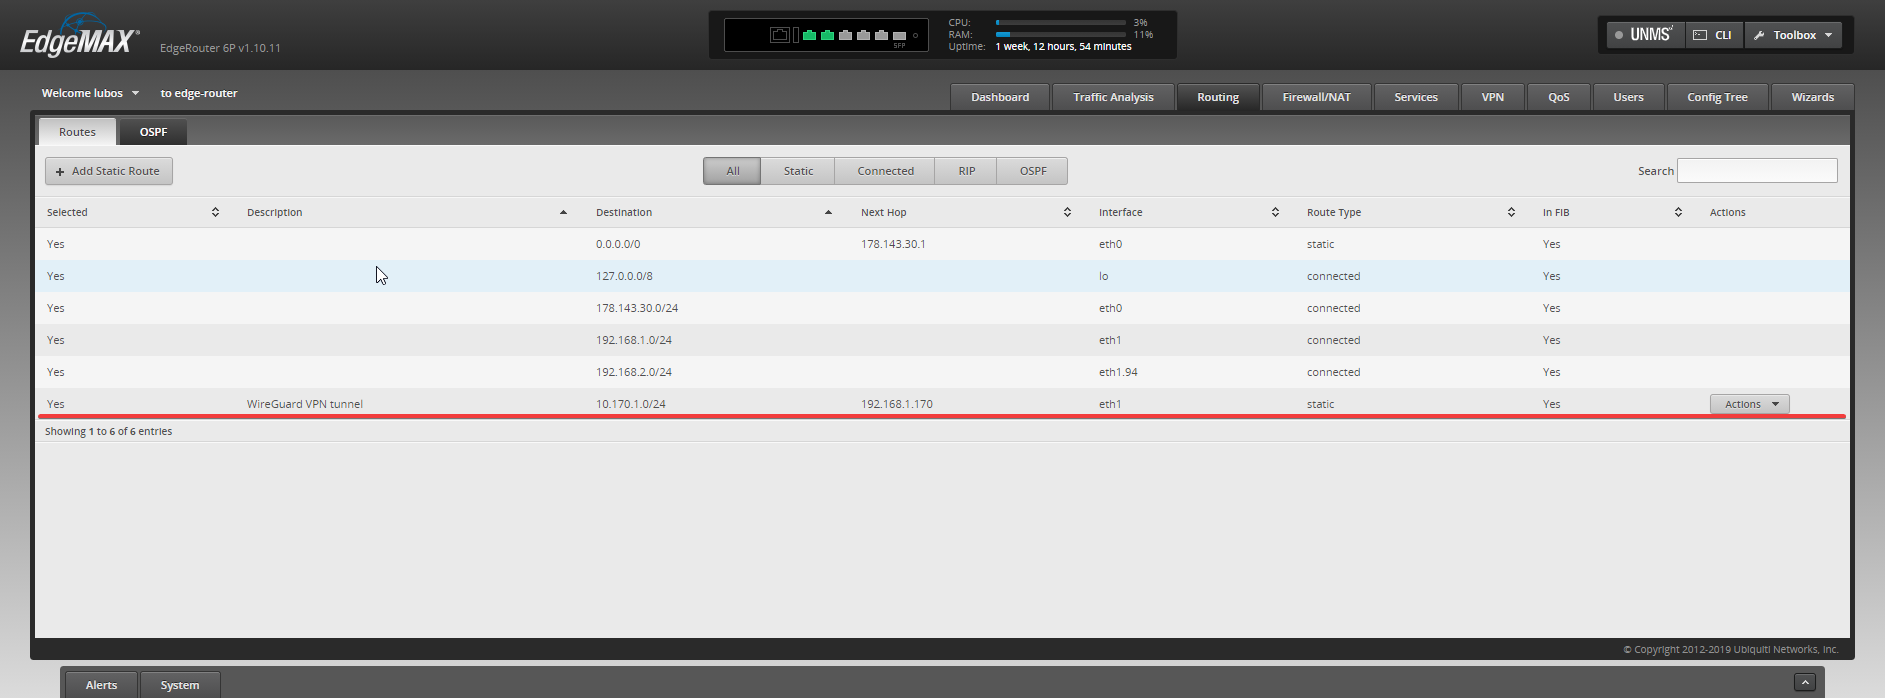
Now, it's testing time! Let's SSH into some of my machines in home site and test pinging one of our clients in VPN network.

Bingoo, everything works as a charm. Now I can reach my remote sites from all my devices on LAN and all my servers in remote sites can reach LAN without an issue. This opens up a lot of possibilities for the future projects! Let's see what will be our next project